Hi,
Thanks for stopping by my blog today. This class features the stunning Enduring Beauty stamp set, coordinating dies and layering stencils from Stampin’ Up!

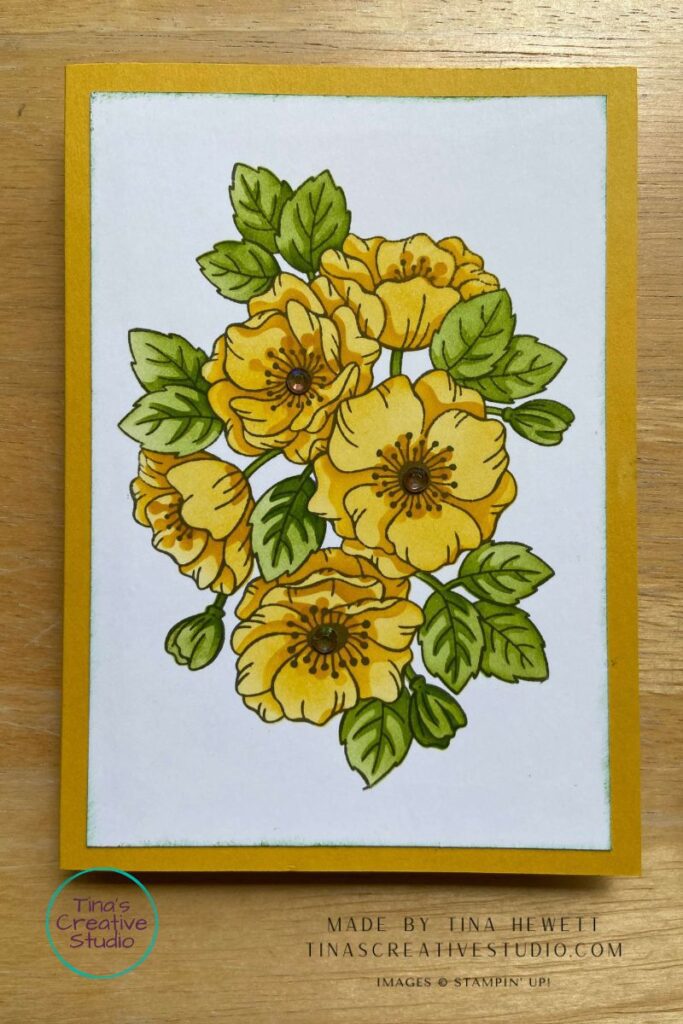
Card 1
Measurements:
Crushed Curry card base: A5 (14.8cm x 21cm) scored and folded to 14.8cm x 10.5cm
Basic White: 13.8cm x 9.5cm, 14.3cm x 10cm for inside the card
Supplies:
Stamps: Enduring Beauty
Decorative Masks (stencils): Enduring Beauty
Ink: Crushed Curry, Granny Apple Green, Memento Tuxedo Black
Cardstock: Crushed Curry, Basic White
Embellishments: Iridescent Rhinestones
Instructions
- Stamp the large floral outline image onto a panel of Basic White. You might like to tape the panel to your work surface.
- Place stencil 1 over the top, lining up the flowers, tape down or mark on your grid paper where the notch is. Apply Crushed Curry ink with a Blending Brush in a circular motion over the stencil openings. Remove the stencil.
- Place stencil 2 on the panel, lining it up with the leaves. Tape down. Apply Granny Apple Green ink with a blending brush over the openings. Remove the stencil.
- Place stencil 3 on the panel, which adds shadows to the petals. Line up with the previous notch mark. Apply another layer of Crushed Curry ink with a blending brush. Remove the stencil.
- Place stencil 4 on the panel, this adds the veins to the leaves, plus a few stems. Apply Granny Apple Green ink with a blending brush. Remove the stencil.
- Place stencil 5 on the panel, this adds depth to the flower centres. Apply Crushed Curry ink with a blending brush. Remove the stencil.
- Use a sponge dauber to add a little Granny Apple Green ink to the edges of the panel. Adhere to the card front. Adhere the other white panel to the inside of the card.
Here’s a link to the video: https://youtu.be/T1IdVmlTB7Q
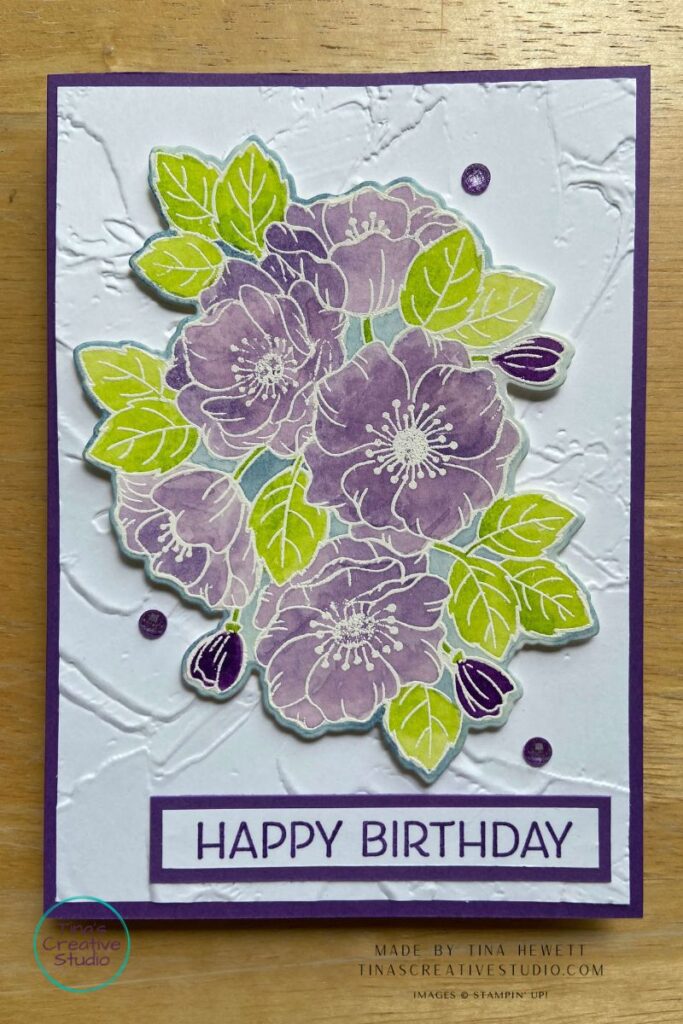
Card 2 – Watercolour Birthday
Measurements:
Gorgeous Grape card base: A5 (14.8cm x 21cm) scored and folded to 14.8cm x 10.5cm
Basic White: 14.3cm x 10cm (2)
Watercolour Paper: 14.3cm x 10cm
Supplies:
Stamps: Enduring Beauty, Artistically Inked
Dies: Enduring Beauty
Embossing Folder: Painted Texture
Ink: Versamark, Highland Heather, Gorgeous Grape, Parakeet Party, Boho Blue
Cardstock/Paper: Gorgeous Grape, Watercolour paper, Basic White
Accessories: Heat tool, White embossing powder, water brushes
Embellishments: Purple Fine Shimmer gems
Instructions
- Emboss one of the white panels using the Painted Texture 3D embossing folder. Adhere the embossed panel to the card front. Adhere the other white panel to the inside of the card.
- Swipe an embossing buddy over the watercolour paper to remove static. Stamp the large floral image in Versamark ink, sprinkle white embossing powder over the image and heat set with a heat tool.
- Drop some ink onto an acrylic block or paint palette. I used Highland Heather for the flowers, Gorgeous Grape for the buds, Parakeet Party for the leaves and Boho Blue for around the edges and in between the flowers. Using a water brush, add a little water to the ink and paint on the panel. I started with the leaves, then the flowers, buds and background. Add water as needed to lighten the shade of colour. To have a darker shade, use less water. The white embossing should help to keep in the lines, as it will resist the ink. Let dry or use a heat tool. Die cut with the matching outline die. Use foam Dimensionals to attach to the card front.
- Stamp the greeting in Gorgeous Grape ink on an offcut strip of white. Trim to size, adhere to a wider strip of Gorgeous Grape cardstock and trim to size. Adhere to the card front.
- Add a few purple fine shimmer gems for bling.
Here’s a link to the video: https://youtu.be/9H_6FPKDbJ4
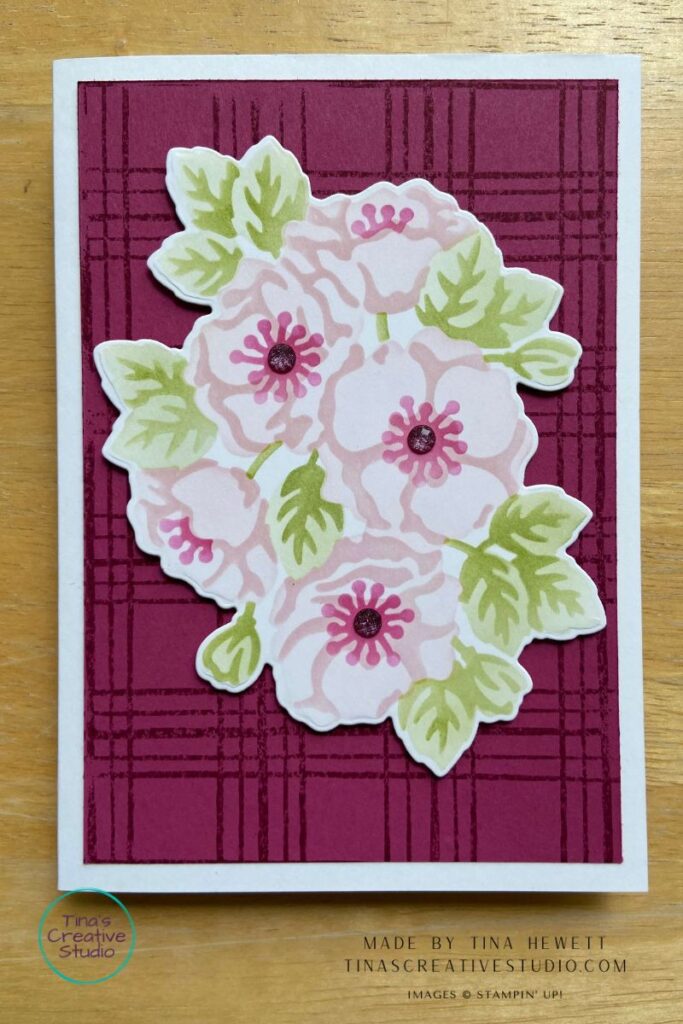
Card 3
Measurements:
Thick Basic White card base: A5 (14.8cm x 21cm) scored and folded to 14.8cm x 10.5cm
Basic White: 14.3cm x 10cm
Berry Burst: 13.8cm x 9.5cm
Supplies:
Stamps: Enduring Beauty, Sketched Plaid
Dies: Enduring Beauty
Decorative Masks (stencils): Enduring Beauty
Ink: Bubble Bath, Granny Apple Green, Berry Burst
Cardstock: Thick Basic White, Basic White, Berry Burst
Embellishments: Purple Fine Shimmer gems
Instructions
- Stamp the Sketched Plaid background stamp onto the Berry Burst panel using Berry Burst ink. In the video I show how I have the stamp on a block with the rubber side up, tap the stamp pad on it, then lay the cardstock panel on top, put a piece of scrap paper over and rub over the panel with my fingers. Adhere to the card front.
- Place the white panel onto your work surface. You might want to tape it down with low tack painter’s tape. Place stencil 1 over the top, mark where the notch is so you can line up the next stencils. Use a Blending Brush to lightly apply Bubble Bath ink to the open areas in a circular motion. Remove the stencil.
- Place stencil 2 over the top, lining it up with the notch mark from the previous stencil, and using Granny Apple Green, lightly apply the ink to the open areas to give the leaves a base layer. Remove the stencil.
- Place stencil 3 over the top and apply another layer of Bubble Bath ink through the open areas, to give shading to the petals. Remove the stencil.
- Place stencil 4 over the top and apply another layer of Granny Apple Green ink with the blending brush to the open areas, giving the veins to the leaves and filling in a few stems. Remove the stencil.
- Place stencil 5 over the top and lightly apply Berry Burst ink to the flower centres. Remove the stencil.
- Die cut the image with the matching outline die. Use Dimensionals to attach the image to the card front. Add a few Berry Burst gems from the purple fine shimmer gems pack for bling.
Here’s a link to the video: https://youtu.be/Wq-CUWzYDAw
Download the printable PDF instructions here: https://s.tamp.in/CWfund
Here are the supplies I used to make these cards, click on an image to go to my online store.
Product List")
")


If you have any questions, please feel free to contact me.


