Slimline cards have been very popular lately, and Stampin’ Up! has made it easy to make cards in this format with the Slim Cards dies that coordinate with the Slim Sayings stamp set.
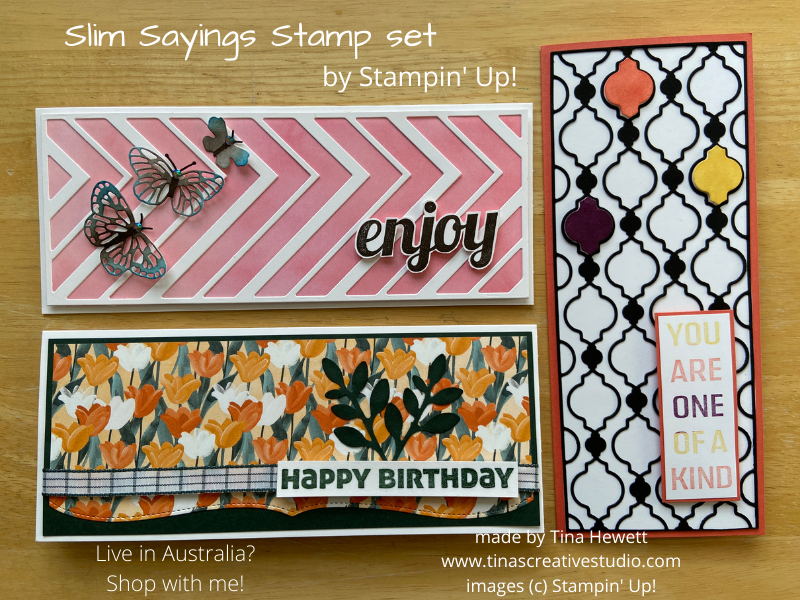
I created these cards to suit the size of the card front dies, starting with a base of 8-1/2″ x 7″, which were scored and folded in half to create a card front measuring 8-1/2″ x 3-1/2″.
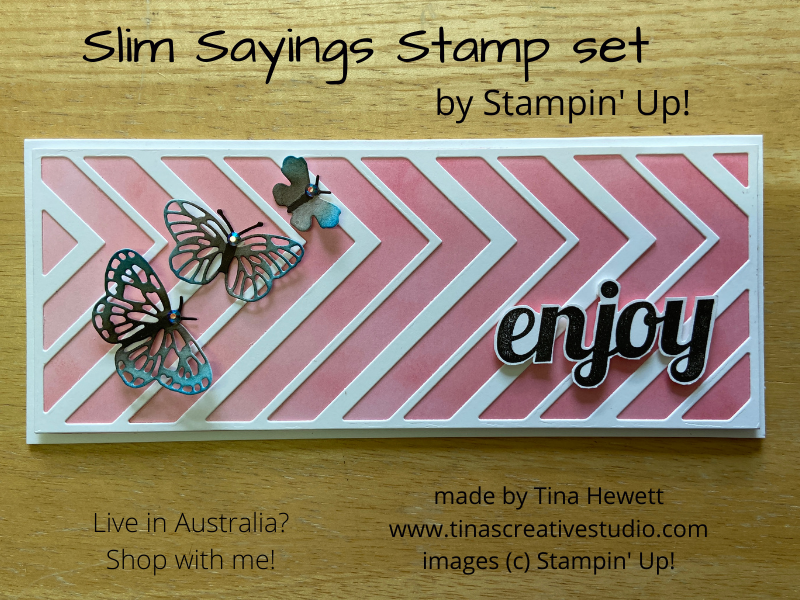
For the first card I was inspired by a card made by Mary Fish, you can see that HERE. I used her colour combinations of Flirty Flamingo, Sweet Sorbet and Real Red for the ink blended background, but then changed a couple of things. I stamped the greeting in Early Espresso ink onto a scrap of Basic White and fussy cut with scissors. I die cut the butterflies from Basic white, coloured the bodies with an Early Espresso Stampin’ Write marker, then used daubers to apply some Early Espresso and Pacific Point ink to the wings. The butterflies were attached with mini glue dots, and then I added Iridescent Rhinestones to each.
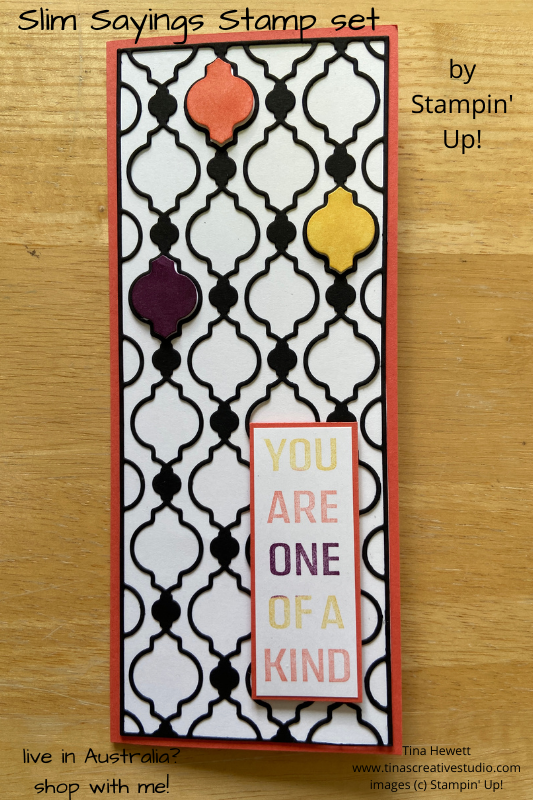
The second card features the quatrefoil die from the bundle. I cut 2 of these, one from Basic Black cardstock and the other from Basic White. I overlaid the black one onto white and glued it to a Calypso Coral card base. I then used sponge daubers to colour 3 of the white cut-outs: Daffodil Delight, Calypso Coral and Blackberry Bliss. These were then raised on Dimensionals and attached to the card front.
For the greeting I used the same 3 colour inks: Daffodil Delight, Calypso Coral and Blackberry Bliss, applying ink to the words directly onto the rubber stamp. Then I huffed on the stamp to re-moisten the ink and stamped it onto a scrap of white. I trimmed this piece to fit and then matted it in a slightly larger piece of Calypso Coral.
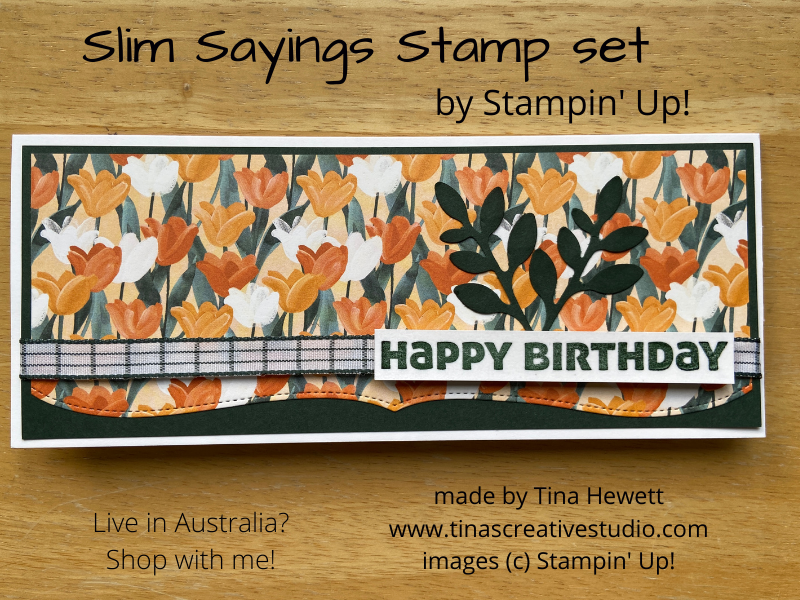
For the third card I kept it very simple, just using one of the edge dies in the set on a piece of patterned paper from the Flowering Fields Designer Series Paper pack. This was layered onto a panel of Evening Evergreen cardstock and onto the Thick Basic white card base. I punched out a couple of sprigs using the Bough punch – tip: punch from the green panel that you are using as a mat – no one will see it and you will save cardstock. These sprigs were tucked under a piece of ribbon that was wrapped around the matted panel and the greeting was stamped in Evening Evergreen ink onto a scrap of white and trimmed to size. You can’t see in the photo but I actually embossed this with clear embossing powder.
If you’d like to make these cards, here are the supplies used. Please note that the some of the products will retire on June 30, 2022.
Product List")


 Designer Series Paper")
 Windowpane Check Ribbon")


Happy stamping,
Tina


