Back in February I did a class taught by the fabulous Helen Clifton where she showed us how to make our own texture paste that dries quickly so that you can make a card in a short amount of time.
As preparation for the class I watched a few YouTube videos on how to add colour to texture paste, so I knew which supplies to take along.
At the class Helen made the texture paste using the following recipe:
- 1/4 cup talcum powder
- 1 tbsp white glue (aquadhere)
- 1 tbsp white acrylic paint
These are mixed together with a few drops of water until it is the consistency of toothpaste.
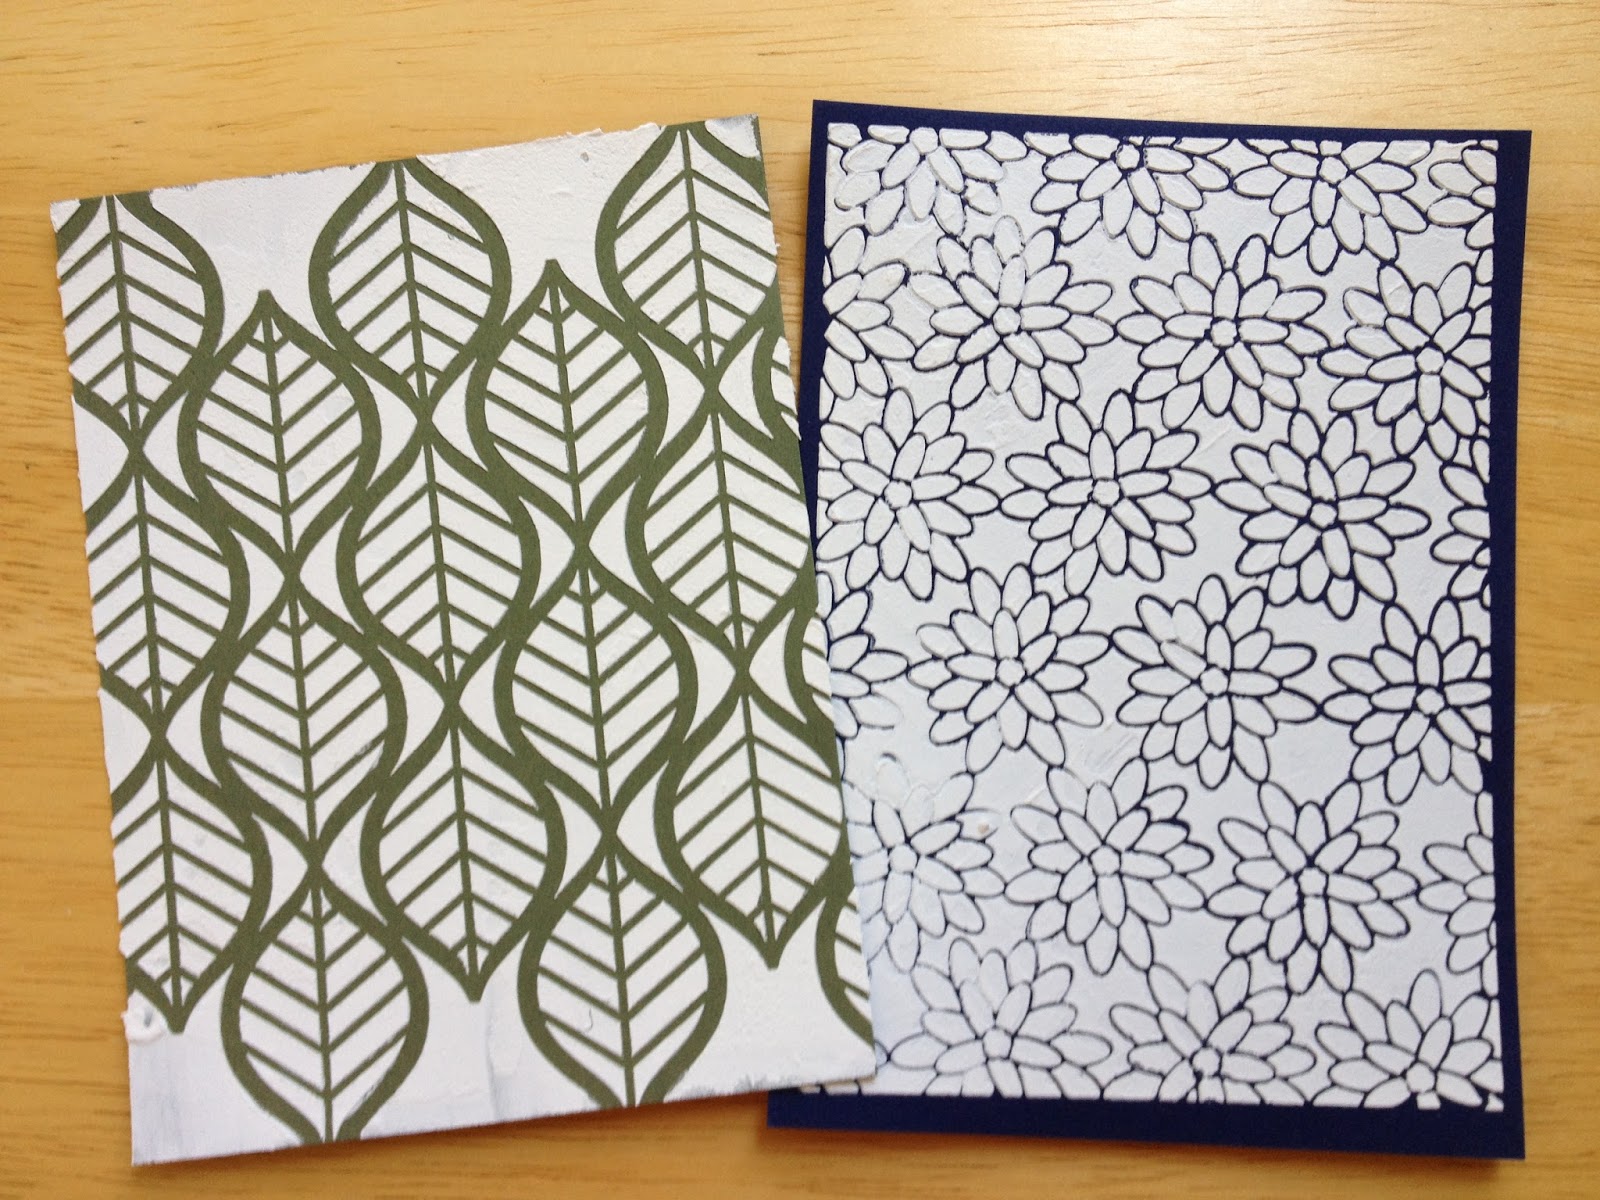
Here are the first 2 cards I started in class and finished at home:

I coloured the white texture paste by rubbing an ink pad onto my craft sheet, then adding the white embossing paste to the ink with a small spatula.
Then I taped a stencil to the card panel, and picked up the embossing paste and smoothed it over the stencil. Once it was fully covered I removed the stencil, which was washed straight away, and put the panel aside to dry, which was really only a few minutes. These smell nice due to the baby powder that was used. I guess if you want to make male cards you might want to use a more manly-smelling talcum powder.
The card on the left uses Stampin Up’s Happy Patterns Decorative Masks (138313) and the card on the right uses a stencil by Balzer Designs. The greeting on the card on the left is from Stampin Up’s Botanicals For You special Sale-a-bration set, and for the card on the right I used the word stamp from Crazy About You and the hello die from the Hello You Thinlits Dies from Stampin Up.
I was inspired to make my own batch of texture paste at home and make some card fronts/panels using different colours and stencils.


I used up the whole batch of texture paste to make these 12 panels, which are A6 size for a standard card front.
I have yet to make cards with them, but when I do I’ll post them to my blog and Facebook Page.
Have you made cards using texture paste? If so I’d love to see them. You can send them to me via email and I’ll feature them here on my blog!
Happy Stamping,
Tina


